


Photo by James Harrison on Unsplash
NodeJS Console App with TypeScript, linting and testing
A quick tutorial on how to start a project for a Console App, in NodeJS, with support for TypeScript, linting and testing.


Let's dive right into it, lean and mean.
The base project 🚀
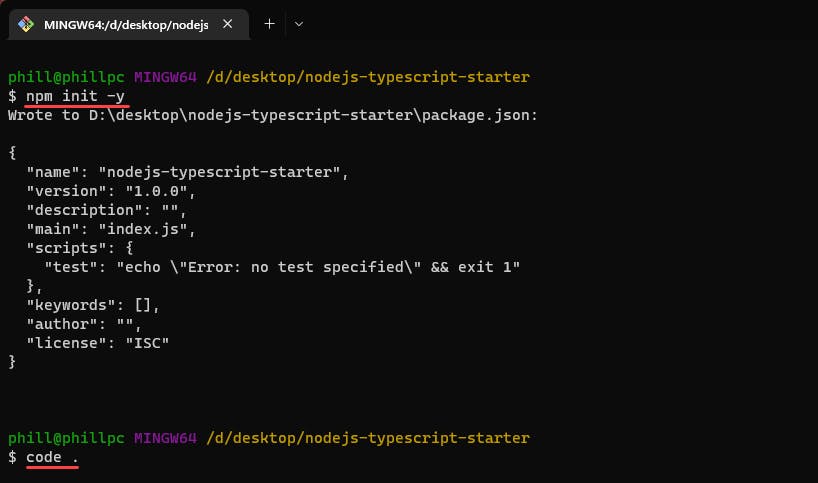
1) Create your project folder and enter it
2) Run npm init -y
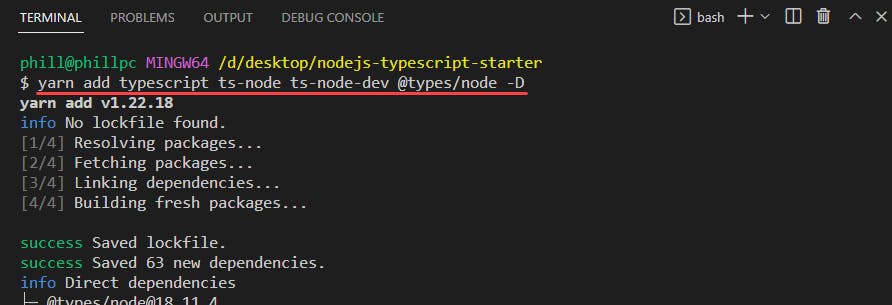
3) Install the following packages:
yarn add typescript ts-node ts-node-dev @types/node -D
4) Add the tsconfig.json file in the root and this as content:
{
  "compilerOptions": {
    "target": "es6",
    "module": "commonjs",
    "outDir": "dist",
    "rootDir": "src",
    "strict": true,
    "sourceMap": true,
    "moduleResolution": "node",
    "esModuleInterop": true
  },
  "include": ["src/**/*.ts"],
  "exclude": ["node_modules"]
}
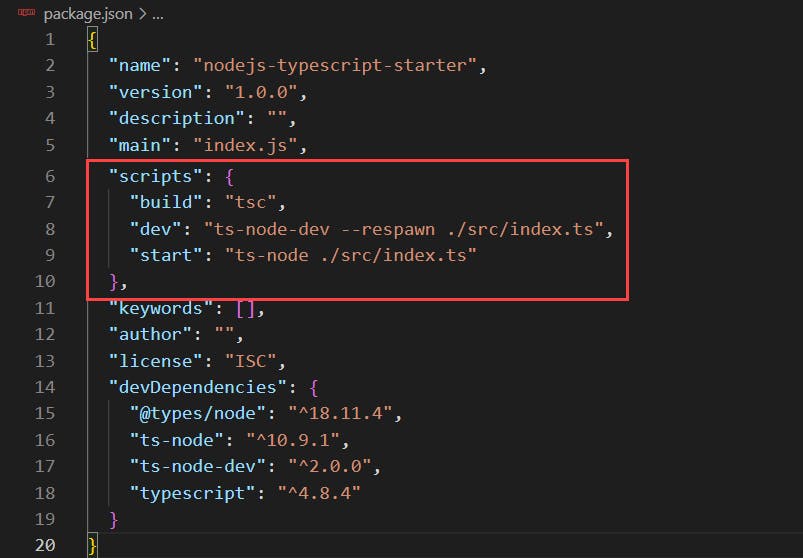
5) Edit package.json to add some useful scripts
"scripts": {
  "build": "tsc",
  "dev": "ts-node-dev --respawn ./src/index.ts",
  "start": "ts-node ./src/index.ts"
},
6) Add some starter code
Create src/getGreeting.ts with:
export function getGreeting(name: string): string {
  return `Hello, ${name}!`;
}
Create src/index.ts with:
import { getGreeting } from "./getGreeting";

const greeting = getGreeting("John");
console.log(greeting);
7) Run the project
- Use
yarn buildto build the project and see the output at/dist - Use
yarn devto start your application in dev mode, which will hot-reload upon changes to the code - Use
yarn startto start your application without hot-reload
Additional capabilities 📦
Linting 🔎
Install the packages:
yarn add eslint typescript @typescript-eslint/parser @typescript-eslint/eslint-plugin -D
Create .eslintrc.js in the root with:
module.exports = {
  root: true,
  parser: "@typescript-eslint/parser",
  plugins: ["@typescript-eslint"],
  extends: ["eslint:recommended", "plugin:@typescript-eslint/recommended"],
};
Create .eslintignore in the root with:
node_modules
dist
.eslintrc.js
Add/modify the scripts in package.json:
"build": "eslint . --ext .ts && tsc",
"lint": "eslint . --ext .ts"
Run the linter with yarn lint. The "build" command now runs the linter as well.
Testing 🧪
Install the packages:
yarn add jest ts-jest @types/jest -D
Create jest.config.ts in the root with:
import type { Config } from "jest";

const config: Config = {
  verbose: true,
  preset: "ts-jest",
  testEnvironment: "node",
};

export default config;
Create src/getGreeting.spec.ts with:
import { describe, expect, it } from "@jest/globals";
import { getGreeting } from "./getGreeting";

describe("getGreeting", () => {
  it("should return Hello, John!", () => {
    expect(getGreeting("John")).toEqual("Hello, John!");
  });
});
Add the script in package.json:
"test": "jest"
Modify the exclude clause in tsconfig.json to read:
"exclude": ["node_modules", "src/**/*.spec.ts"]
Run your tests with yarn test.
For a better experience, make sure you have the Jest extension, which will show a side-bar in VS Code, will autorun tests as they are created or modified, and will allow you to right-click to run or debug a test.
Debugging 🪲
Create .vscode/launch.json with:
{
  // Use IntelliSense to learn about possible attributes.
  // Hover to view descriptions of existing attributes.
  // For more information, visit: https://go.microsoft.com/fwlink/?linkid=830387
  "version": "0.2.0",
  "configurations": [
    {
      "type": "node",
      "request": "launch",
      "name": "Launch Program",
      "skipFiles": ["<node_internals>/**"],
      "args": ["${workspaceFolder}/src/index.ts"],
      "runtimeArgs": ["--nolazy", "-r", "ts-node/register"],
      "sourceMaps": true,
      "cwd": "${workspaceFolder}"
    }
  ]
}
Press F5 or go to the "Run and Debug" tab and hit play to start debugging.
Other features ✨
Refer to my older post for instructions on how to add support for environment variables, API access and asycn and await.
Bonus 🎁
Download the finished starter project from https://github.com/phillippelevidad/nodejs-typescript-starter.